Easily install pre-built Shopify section templates without hiring a developer!
Shopify Insights
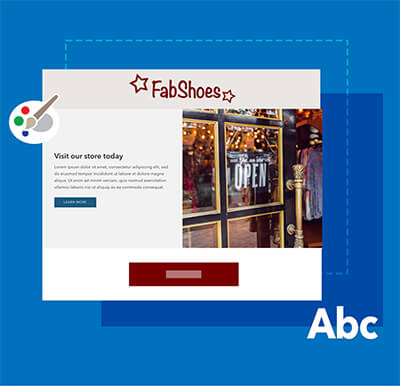
How to add custom fonts to your Shopify store


Shopify is a popular e-commerce platform that provides users with a variety of customization options for their online store. One of these customization options is the ability to add custom fonts to your Shopify theme. By adding custom fonts, you can give your store a unique look and feel that sets it apart from other online stores. In this article, we will guide you through the process of adding custom fonts to your Shopify theme.
Before we begin, there are two ways to add custom fonts in Shopify.
- In the Theme Editor (and based on how the developer of your theme), you have a way to select a font from a long list of fonts that are built into Shopify itself. You can easily just select a font wherever the theme (or section) gives you the choice to do so.
- Use a font from font foundries like Google Fonts, Adobe Typekit and FontSquirrel.
- Manually install font files.
Let’s discuss option #2 and #3 in more detail.
Step 1: Choose a custom font
The first step in adding custom fonts to your Shopify theme is to choose the font you want to use. There are many sources for free and paid fonts on the web, including Google Fonts, Adobe Typekit, and FontSquirrel. When choosing a font, consider its readability, legibility, and how well it will match the style of your store. There are plenty of font families available that include different weights and styles and whether they are better to be used as headings versus body text.
Step 2: Paste a snippet linking the font from the foundry
In most cases, when selecting a font family from one of the foundries, you get a link that looks something like this:
<link rel="stylesheet" href="https://use.typekit.net/vuh5cij.css">or
<link rel="preconnect" href="https://fonts.googleapis.com">
 <link rel="preconnect" href="https://fonts.gstatic.com" crossorigin>
 <link href="https://fonts.googleapis.com/css2?family=Space+Grotesk:wght@400;500&display=swap" rel="stylesheet">
You will need to paste this at the top of every page of your site. With Shopify, this will be in the theme.liquid file located in the “layouts” folder. In this file, paste the code anywhere within the <head> and </head> tags.
*** If your foundry provides you with the actual font files instead of a link as described, then you will need to take those files and upload them to either the “files” folder or to the “assets” folder.
- The upload the files to the “files” section in the admin, click on the category called “Content” in the Shopify admin and then on “Files”. You can then upload the files here. Then copy the path to these files by clicking on the icon to the right and save them for the next step.
- To upload the font files to the “assets” folder, go to “Online Store” and click on “Themes” on the left side bar of the Shopify admin. Then, choose the theme you’re working on (preferably not your live, published site – you should duplicate your live site when making any code changes so that mistakes don’t affect your live site). Click on the button with the three dots and select “Edit Code”.
Next, find the “Assets” folder and click on “Add a new asset” and upload these files there.
Step 3: Create a font-face rule
*** If you installing the files manually, then continue reading. Otherwise you can skip this step.
Now you will need to create a "font-face" rule in your CSS file. The font-face rule allows you to specify the location of the font file and give the font a name. To create a font-face rule, you can use the following code:
@font-face { font-family: 'Your Font Name'; src: url('font-file.ttf') format('truetype'); }
Replace "Your Font Name" with the name of your font and "font-file.ttf" with the full path and filename of the font file.
- If you uploaded the font to the “Files” folder, then you should replace
“font-file.ttf”with the path you copied in the previous step. - If your font files were uploaded to the “Assets” folder, then you should replace “font-file.ttf” with the following code:
{{ "<<PASTE FILE NAME HERE>>" | asset_url }}
Step 4: Add the custom font to your CSS file
Once you have created the font-face rule, you will need to add it to your theme's CSS file. To do this, log in to your Shopify store and go to the "Online Store" section of the Shopify Dashboard. Click on the "Actions" button and select "Edit code". In the file explorer, navigate to the Assets folder and find the "theme.css" file. Once located, open the file and paste the font-face rule that you created in the previous step at the top of the file.
Note: This file can be named differently, depending on your theme. But you should search for a CSS file with this file extension.
See our note at the end of this article if you’re trying to update your custom font on one of our Shopify sections.
Step 5: Apply the custom font
The final step is to apply the custom font to the elements of your website that you want to display in the new font. To do this, you will need to add some CSS code to your theme. In the same "theme.css" (or similar) file, add the following code:
body { font-family: 'Your Font Name', sans-serif; }
Replace "Your Font Name" with the name of the font you created in the font-face rule. This code sets the font-family property of the body element to your custom font.
Note: Typically, for foundries that provide you with a simple link (as opposed to actual font files), they should have provided you with this snippet of the font name already.
Extra tip for those who have qwiqode sections installed
In addition to providing the option to select a font from the built-in list in the Theme Editor, qwiqode sections also provide you with a text field to paste the font-family rule as well. So you would simply take just the rule itself (i.e. font-family: 'Your Font Name', sans-serif;) and paste it in the field provided.
By following these steps, you can successfully add custom fonts to your Shopify theme and give your store a unique look and feel. Whether you want to use a more stylish font for your headings or a more readable font for your body text, custom fonts are a great way to make your store stand out.